Showing posts with label Comfort Foods. Show all posts

Sunday, July 31, 2011

Fear Factor - Phobia V: Tacos de Lengua


Before you turn to your Spanish dictionary for confirmation, yes, these tacos are made from beef tongue.  Please don't run away kicking and screaming, you'll really be missing out!

I pride myself on not being a picky eater.  That being said, I have never really eaten or cooked any sort of offal - "the nasty bits" as Anthony Bourdain would say, nose-to-tail, the organs that often get discarded.  To be honest, I'm afraid.  Very afraid.  The smell of liver and onions that would permeate our house once a year as a child still gives me nightmares.  I don't like pate, foie gras or any other "delicacy" made from those other cuts.

But I do want to try new things, grow some cajones, conquer my fears and explore different cultures.  Traditionally (and in many places even today), meat was very expensive and these were often the only cuts the average person could afford.  They learned how to cook them well, make them delicious, and many of our favorite dishes today were the result of such ingenuity.


I figured that the best place to start my foray into this whole new world was with a cut that was still a muscle, just like the steak harvested from other parts of the cow.  I'd heard good things about beef tongue from everyone who'd tried it and it's almost a religious experience for taco truck obsessives. So when a sign posted at Springfield Farm alerted me to FREE beef tongue (along with livers, kidneys and other, scarier meats), I figured why not.  After all, if I didn't like it I could throw it away without the guilt.  My philosophy always when trying something new is not to vary too much from the classic preparation.  Therefore, I set out to make some beef tongue tacos.

And I have to say, I'm so glad I did.  Cleaning the tongue was the hardest part, with a bit of an ick factor, because there's no doubt what you're dealing with.  Most recipes call for boiling the tongue, then peeling back the skin, but I chose to cut the skin off first so that I could sear and braise the meat.  Although this was a bit more difficult then cooking it first, I think it allowed me to develop more flavor and quickly disguise the cut for the squeamish.  Once braised in a tomato and chile based sauce, it was tender and super flavorful, the essence of what a beef taco should be.  At this point, it looked and felt just like pot roast, not scary at all.  If you're on the fence, do give it a try.  Sandwiched in a corn tortilla with fresh salsa and sharp cheddar, I honestly think these might be the best tacos I've ever had.

Tacos de Lengua (Braised Beef Tongue Tacos)


Note: this makes WAY more sauce then you will use for the amount of meat, but it is necessary to properly braise the meat.  The extra freezes well and is a great enchilada sauce or base for a mexican soup or chili.

1 3-4 lb. beef tongue
1 quart tomatoes (alternatively substitute canned stewed tomatoes and skip the skinning step)

2 Tbsp olive oil (divided)
spice rub of your choice
1 large onion
1 chipotle in adobo, minced
2 Tbsp tomato paste
2 tsp chile powder
2 tsp garlic powder
2 tsp ground cumin
1 tsp ancho chile powder
1 tsp dried oregano
1 tsp sea salt
1 cup red wine
3-4 cups beef stock

1 tsp olive oil
6 inch corn tortillas
grated sharp or extra sharp cheddar
fresh (preferably homemade) salsa
other toppings of your choice (ex: sour cream, guacamole, radish, shredded carrots or lettuce, avocado, etc)

Bring a large pot of water to a boil.  Prepare an ice bath in a large bowl.  Slit each tomato with a paring knife.

When the water is boiling, add the tongue and boil for 5 minutes or so.  Emerge in ice bath to cool down.  Use a sharp serrated knife to trim away the tongue of all skin and any meat that seems to have an odd texture (such as where the tongue attaches to the mouth of the cow) and discard.  Meanwhile, immerse the tomatoes in the boiling water until their skin starts to peel away, then plunge them into an ice bath.  After they've cooled, peel and remove any tough cores, then set aside.

Drain your pot of water, add 1 Tbsp of oil and put over medium high heat. Split the tongue into 2 pieces, preferably similar in size.  At this point it should resemble a chuck roast or another normal beef cut.  Rub each piece with the spice rub.  I used McCormick's Cowboy Rub.  Any sort of Mexican, steak or BBQ rub will do.  Sear the tongue on each side until well browned.  Remove and set aside.

Add the remaining Tbsp of oil and saute onions until soft.  Add chipotle, tomato paste and seasonings.  Saute until slightly caramelized and beginning to brown on the bottom of the pan.  Add red wine and stir to deglaze.  Reintroduce the tomatoes and tongue and transfer to a slow cooker.  Add enough stock to almost cover the meat.  Cook on the high setting in the slow cooker for 4 hours.

Remove beef tongue.  Puree sauce (I recommend a stick blender for this) and bring it to a boil to reduce. Meanwhile, chop the meat.  The sauce should reduce until thickened, a little bit less thick then a marinara.

When this consistency is reached, heat up a tsp of oil in a small skillet.  Fry up the tongue meat (about a cup for every 3 tacos) for a couple of minutes before adding a big spoonful of sauce.  Let cook about another minute in the sauce.  Meanwhile, spritz tortillas with cooking spray and toast in a large nonstick pan until slightly charred.

To assemble, sprinkle tortilla with shredded cheese, pile in meat and top with salsa and other toppings of your choosing.  Then sit back and enjoy taco nirvana, preferably alongside a cold Corona with lime.

Saturday, July 2, 2011

Rhody Style Clam Cakes


Why hello there!  Yes it's been a while.  But no time for apologies, no time for explanation, I'm just glad you're still here.

Let me tell you about something incredible.  Something that defines me.  Something like Dell's, coffee milk, Rocky Point, Portuguese sweet bread and clam bakes.  It's a food so dear to Rhode Islander's hearts that eating it brings back visions of lopsided tables sinking into the sand on a Block Island beach with a Jimmy Buffet tribute band playing in the background.  And it's virtually unknown outside of the state!

Behold the clam cake!  More of a fritter than a cake, it's sort of like a hush puppy embedded with salty, sweet & tender clam meat.  Light and fluffy inside, with a crisp exterior and little bits of pleasantly chewy clams.  They're great alongside a bowl of chowder (white of course!  is there any other kind?) or with a squeeze of lemon or dash of hot sauce.  This is the flavor of the Narragansett Bay in summertime.  Perfect for this Independence day weekend!

Clam Cakes

Adapted from the Clam Fritter recipe by Craig Claiborne of the NYTimes as posted on One Perfect Bite


Use a large and flavorful clam for this dish.  Since you're chopping them anyway, you don't need to shell out the extra money for tender cherrystones or littlenecks.  Furthermore, they won't quite deliver the flavor of the larger clams.

approximately 2 dozen fresh quahog or mahogany clams (should yield about 2 1/2 cups clam meat)

2 eggs
1 Tbsp fresh lemon juice
1/3 cup reserved clam juice
1/4 cup 2% milk
1 Tbsp melted butter
zest of 1/2 a lemon
pinch of cayenne pepper
1 tsp garlic powder
1 1/2 tsp salt
1 tsp freshly ground black pepper
3/4 cup all purpose flour
1/4 cup finely ground yellow cornmeal
1 tsp baking soda
2 tsp baking powder
1/4 cup finely chopped fresh flat leaf parsley

vegetable oil

Rinse the clams under cold water and pile into a stockpot.  Add about 1/2 an inch of water to the bottom of the pot and bring to a boil over medium high heat.  Cover and reduce heat to low.  Simmer only until clams have started to open.  Stir to allow more to open and simmer covered briefly until the majority have opened up.  Allow to cool slightly

Remove the clam meat to a cutting board and discard all shells and unopened clams.  Coarsely chop the clam meat and set aside.  Strain the clam juice through a coffee filter to remove the grit.  Some of this will be used later.  Don't throw away the rest!  It's great in chowders and other soups and it freezes beautifully!

Whisk together eggs, lemon juice, 1/3 cup of clam juice, milk, butter, zest and seasonings.  Sift in flour, cornmeal, baking soda and baking powder and stir until just combined.  Add chopped clams and parsley and stir until well distributed.

Fill a heavy cast iron skillet to about a 1/2 inch depth with vegetable oil.  Preheat the oil over medium high heat until it is hot but not smoking.  At the right temperature the handle of a wooden spoon will bubble when held in the oil.  Dollop the batter into the oil about 2 Tbsp at a time, leaving plenty of room in between the cakes.  Fry about 2 minutes on each side, until golden brown and crisp on the outside and light and fluffy inside.


Drain on paper towels and season with sea salt while still hot.  Serve with lemon slices or hot sauce.

Tuesday, August 3, 2010

Sweet Corn Risotto


The produce this time of year makes me so excited.  Every time I pick up my CSA share I feel like I'm unwrapping presents at Christmas time.  What in the world could possibly be better than heirloom tomatoes, sweet corn, watermelon and peaches?

With such great produce overflowing out of my fridge, you need some really fantastic dishes to showcase it.  Most of these are so simple I don't even post them because it feels like cheating.  Is it really a recipe if it takes 5 ingredients or less and involves mostly chopping?


Risotto on the other hand is to me the definition of the craft.  There's something about chopping and sauteing aromatics, toasting rice, meditatively stirring to coax the rice into drinking up the stock and finishing with a flourish of butter and cream that personifies what it is to be a cook.  It's a very zen activity for me because the dish is not difficult, but needs consistent nurturing.  I guess that's why I've already given you so many versions, from a homey wintery sausage and radicchio, a bright primavera, and a briny seafood version.

This time around I'm showcasing one of summer's mascots - sweet corn.  Some gorgeous tomatoes also made their way in there, providing the acid to counterbalance the corn's sweetness and the richness of the butter and cream.  Inspired by a corn chowder, it starts with a little smidge of bacon.  Some scallions and basil lend a seasonally herbaceous finish.

Sweet Corn Risotto
Serves 8 as a first course, 4-6 as an entree depending on how hungry your guests are


3 cobs of local sweet corn, husked (the local part is imperative to getting the sweetest corn - the sugar converts to starch quite quickly after harvesting)
5 cups vegetable stock
1 cup milk

3 slices center cut bacon, diced
1 small sweet onion, diced (about a cup)
1 large clove garlic, minced
1 1/2 cups arborio or other risotto rice
2/3 cup sweet white wine such as Riesling

2/3 cup heavy cream
1 Tbsp unsalted butter
1/3 cup grated parmiggiano reggiano

1 large heirloom tomato, cored and diced (about 1 1/2 cups)
3 Tbsp chopped scallions
1 1/2 Tbsp chopped fresh basil


Remove the kernels from the cob and reserve.  I love my corn zipper for this job, although now they have this nifty new version that looks like it might be a little more natural to use and remove more kernels at once, so it might be time for an upgrade - future Christmas gift anybody? ;)  Snap the corn cobs in half and add them to a medium saucepan along with the stock and milk.  Bring to a simmer then reduce the heat to low.
In a large saucepan or small stockpot over medium heat, brown the bacon.  Once it starts to get crispy add the onion and saute until translucent.  Add the garlic and the rice and toast until the rice is golden and smells nutty.  Deglaze with the sweet wine and add a couple of ladles full of the stock mixture.

Stir the risotto occasionally with a wooden spoon as it cooks over medium heat.  It is time to add a couple more ladle-fulls of stock every time you can push the risotto off the bottom of the pan and no liquid seeps in to fill the line you made.  Continue stirring occasionally and adding stock for about 20 minutes, then add the reserved corn kernels and continue as before.  When the risotto has gotten quite creamy and is almost al dente, add the cream and cook until done (should be 1-2 minutes at this point).

Finish the risotto by melting in the butter and parmesan cheese.  At this point check for seasoning and add salt and pepper as needed.  I don't recommend salting before this point, as the bacon and parmesan both contribute significant salt.  Toss in tomatoes and herbs and serve piping hot.


Leftovers make great arancini or risotto cakes - top them with tomato jam - assuming you don't lick the pot clean first!

Sunday, March 14, 2010

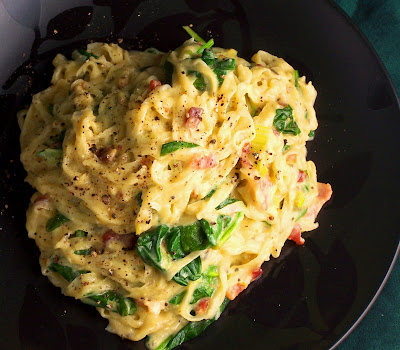
Spaghetti Carbonara


Some foods require planning, prep time, and special ingredients.  This is not one of them.  I'd be willing to bet that at least 70% of Americans have the basic ingredients for pasta carbonara on hand at any given time - pasta, bacon, eggs, some sort of salty grated cheese and cream or milk.  Throw in some veggies of your choice and you've got dinner in the time it takes to boil the pasta.

Of course, everything is better when made from scratch.  So I've used my own homemade spaghetti here, but this is just as satisfying with the store-bought variety.  This is also a meal that in a month or two can be completely local (except for the flour in the pasta), since the eggs, cream, bacon and cheese were all from Springfield Farm and once late spring rolls around we'll start getting our leeks and spinach from One Star Farm.

Spaghetti Carbonara

4-5 slices bacon, cut into thin strips
1 cup cleaned white and light green parts of leeks, sliced into thin half moons
1/2 cup white wine
4 cups baby spinach, washed and dried

1 lb. fresh spaghetti (or boxed)

3 jumbo or 4 large eggs
2 Tbsp heavy cream
1/3 cup grated parmeggiano reggiano or other salty hard cheese
1 Tbsp coarsely ground black pepper

Fill a stockpot with water, salt it generously and place it over high heat for the pasta.

In a medium saucepan, saute bacon until crisp.  Add leeks and saute until slightly tender.  Drain some of the bacon fat out of the pan, then deglaze with white wine.  Turn off the heat and add spinach, stirring occasionally while the spinach wilts.

In the meantime, start cooking the pasta.  Fresh pasta only takes 1-3 minutes so keep an eye on it.

While the pasta cooks, combine the eggs with the cream, cheese and black pepper and whisk to combine.  Temper the eggs by whisking in some of the hot wine then pouring the egg mixture into the pan, constantly stirring until the mixture thickens and comes up to temperature (the heat on the burner should remain turned off, it's just residual heat that cooks it).  You don't want to scramble the eggs.

Drain the pasta and toss with the eggy bacon and veggie mixture.  Serve immediately.

Wednesday, February 10, 2010

English Toffee Bliss


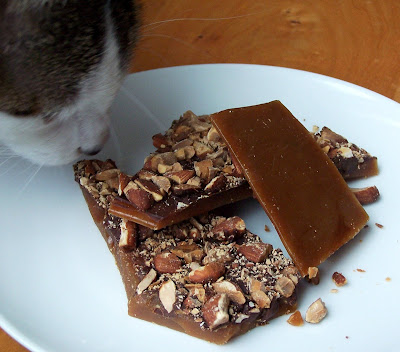
The snow just keeps coming down! Another 20 inches in the last 24 hours - and its not done yet. Maryland usually doesn't have February vacation - but we sure got it this year! We're off until Tuesday - and as you've heard before that means one thing to me - baking. But this time around I just wasn't feeling the usual cookies - instead I wanted something just as sweet and rich and buttery - but with more crunch. English toffee fits the bill and it's the easiest candy you'll ever make. It's probably my favorite as well. Almond extract ups the nutty flavor and espresso powder brings out the chocolateyness. Enjoy!


English Butter Toffee


21 Tbsp unsalted butter
1 1/2 cups sugar
1 tsp sea salt
2 Tbsp water
1 Tbsp almond extract
1 tsp vanilla extract

1 cup semisweet chocolate chips (use the good stuff like ghirardelli)
1 tsp instant espresso powder
1 cup almonds, chopped and toasted

Prepare a sheet pan by buttering it or lining it with a Silpat or other silicone liner.

In a large heavy bottomed saucepan, bring the butter, sugar, salt, water and extracts to a boil over medium high heat, stirring constantly with a wooden spoon. (This takes about 10 minutes). Turn the heat down to medium, stop stirring and let cook until the temperature of the mixture is between 300-310 F on a candy thermometer (hard crack stage).

Remove from the heat and pour out onto the prepared sheet pan. Wait until bubbles and toffee seems to smooth out, then spread chocolate over the toffee slab and sprinkle with espresso powder. Wait about a minute for the chocolate to melt over the hot toffee, then use a spatula to spread it evenly over the toffee. Sprinkle with nuts and press down lightly.

Cool to room temperature then transfer to the fridge for 20 minutes so the chocolate hardens. Once cool, break into pieces and store in an air-tight container at room temperature.


A few notes:
Get a candy/deep fry thermometer! It's almost impossible to make candy or fry things without one.
The liquid butter/sugar mixture is molten and should be treated like lava - use extreme care!
Make sure the sheet pan is on a heat proof surface when you pour on the toffee.
Be careful when pressing down on the nuts - don't press down enough that you'd accidentally touch the toffee and burn yourself.
Immediately fill the pot with water and let it soak after you pour out the toffee or you'll be scrubbing off a candy coating.
Give away about 1/2 this recipe immediately or be prepared to eat the whole batch - it's addictive!

Beware of those who want to steal your toffee - apparently humans aren't the only ones who love this stuff!

Sunday, August 23, 2009

Getting Baked...Twice!


I've had a glut of scallions and potatoes from the CSA lately. Although normally I would turn to Loaded Potato Soup, it's been approaching 100 degrees in Baltimore and soup is just not an option. So I turned instead to Twice Baked Potatoes - admittedly the oven does get some use, but it's not nearly as bad as standing over a simmering pot. This is classic American - like overstuffed potato skins - a guilty pleasure. They're just so good!

Twice Baked Stuffed Potatoes


4 large or 7 medium russet potatoes, scrubbed clean
olive oil

1 Tbsp butter
2/3 cup light sour cream
8 oz. shredded 2% sharp cheddar cheese
3 large scallions, sliced thin
6 slices hickory smoked bacon, cooked until crisp
1 tsp garlic powder
1 tsp freshly cracked black pepper
1/2 tsp salt
1 tsp ancho chile powder

Preheat oven to 400 degrees. Rub potatoes with olive oil and put on a baking sheet. Roast until cooked through, about an hour.

Using an oven mitt to hold the potato, slice down the middle and scoop the insides into a bowl, leaving a 1/4 inch of potato around the skins. Set aside skins and mash butter and sour cream into potato. Stir in 2/3 of the cheese, all of the scallions, bacon and seasonings. Refill the skins with the potato mixture, pressing it into the skins. Press remaining cheese on top. Bake for another 15-20 minutes at 350 degrees.

Thursday, August 13, 2009

Ducking Out


Duck was a common thread throughout my childhood. It was the go-to dish in my father's restaurant repertoire, whether it was orangey Siam duck at our favorite Asian restaurant (the miniscule thai, vietnamese, cambodian hybrid Gourmet House in Providence), the rich duck leg with port sauce at Chardonnays (my favorite restaurant of all time), in tiny drumstick form at that abhorrently expensive fancy-pants terrace in Nova Scotia or any other fine establishment where it popped up on the menu. I guess some kids must think of duck as something you feed at the park and chase around, but I knew better. That was one tasty bird! So while my friends did (and often still do) squirm and squeal at the thought, I relish my duck to myself. Unfortunately I've still managed to convert some along the way, which just means less duck for me.

My husband is a prime example of this. He'd never even considered trying duck until I convinced him to take a bite of the aforementioned Siam version. Now he orders it as often as my father did. I cooked my first duck at home for my first dinner party, and it became one of my first recipes on this site. It was nerve-racking and time-consuming and I've since learned to be smarter about cooking for a crowd, but it was delicious. It didn't deter me from trying again, and subsequent projects have led to successes that include the rich duck broth that graced my soup dumplings.

When honeymooning at Lone Mountain Ranch (which I HIGHLY recommend in every facet - but especially for the food), duck came up on the menu a couple of times. Our first night we lingered for 3 hours over the best meal of my life so far which of course included a seared duck breast and leg of duck confit with a cherry demi-glace. (Of course they outdid themselves with my new best meal ever on our last night with prosciutto wrapped quail over herbed spätzle - but that's a story for another time). Later meals also included duck confit crepes and a huckleberried version.

So as you can see, duck and I go way back. In all truth, our relationship is better when we just meet for dinner with little foreplay. But I've found a way around it. You get succulent, flavorful duck with crispy skin and tender flesh in relatively little time with almost no work. This is the way to do duck at home - on the grill with a sticky sweet glaze! Give it a try - or on second thought, maybe you shouldn't! More for me that way! :)

Grilled Duck with Gingered Sticky Glaze


Spice Rub
2 Tbsp ground ginger
1 Tbsp garlic powder
1 tsp ground coriander
1 tsp 5 spice powder
1 tsp black pepper
1 1/2 tsp salt
2 Tbsp brown sugar

Combine all ingredients and mix well.

Glaze
1/4 cup orange blossom honey
1/4 cup somewhat bitter marmalade
1/4 cup cream sherry
2 tablespoons grated ginger
1 Tbsp finely minced garlic
an orange - zest removed with a veggie peeler and juice squeezed and reserved
1 cinnamon stick
1 bay leaf

Combine honey, marmalade, orange juice and sherry in a small saucepan over medium heat until they start to melt and blend together. Add ginger, garlic, orange zest, cinnamon stick and bay leaf and bring to a simmer. Reduce until very thick (easily coats a spoon without running off.) Let cool.

And now...the duck itself!
1 4-5 lb. duck
1 orange, quartered
1 sweet onion, peeled and quartered

Preheat the grill (gas or charcoal) to a low indirect heat of about 300 to 325 F. If you are using charcoal, gather the coals to both sides and put a drip pan under the middle to cook the duck over. If you are using gas, use only the outer burners and place a drip pan directly under the grate.

Remove any visible fat or pin feathers from your duck, give it a good rinse and pat dry with a paper towel. Prick the skin all over with a sharp knife, taking care to just go through the skin and not into the meat. Rub the skin and the inside of the cavity with the spice rub. Stuff the cavity with alternating pieces of orange and onion.

Place the duck over the drip pan on the unheated side of the grill. Close the lid and cook for one hour, rotating halfway. Check to make sure the duck is cooking evenly and the drip pan is not overflowing. Cook for another half hour, rotating after 15 minutes or until sin is starting to get crispy. Brush with glaze, rotate and cook for 10 minutes at a time, repeating until the temperature of the thigh meat reaches 155 F. At that point, remove from the heat, cover with foil and let rest for 10 minutes before serving.

Friday, June 19, 2009

Put the cream in the coconut...


Every year on memorial day, my fiancé's family heads out to Indiana for the Indianapolis 500. His father has been attending the race for over 30 years, since they lived in the area. My fiancee has gone to 17 himself, and never missed a year. This year was only my third, which pales in comparison.

The race is an incredible experience (and no - it's NOT NASCAR! so please don't put it down so!), but I would be lying if I said it was the main highlight of the trip. Vying for attention is the long awaited trip out to Mooresville, Indiana, home of Gray Brothers Cafeteria. This place is famous for being a must on any road trip, among the greats in true-to-our-roots American cooking. I have a tendency to load up my tray with fried chicken, prime rib, mac and cheese, bacon braised green beans and all kinds of good eats, but mostly it's all about the pie. They have at least 12 delectable varieties on a daily basis, but my hands-down favorite is the coconut cream pie.

So on our return last year, I was still daydreaming about that single wedge of heaven. Unwilling to pine for Indiana until May 2010, I set out to see if I could make a pie that would come close to their classic. Ssshhh...don't tell anyone but I think it's actually better due to a toasted coconut crust. Plus the coconut oil in the crust doesn't contain nasty trans fats found in shortening based crusts. I am of the school of thought that every dish should taste intensely of its feature ingredient, and this delivers coconut pure and simple. I hope you enjoy it as much as I do!

Über Coconut Cream Pie
This recipe has been modified (with lots more coconut flavor) from a recipe in "Pie" by Ken Haedrich

Toasted Coconut Crust


1 1/2 cups all purpose flour
1/3 cup toasted coconut (be careful - it burns easily!)
1 Tbsp sugar
1/2 tsp salt
1/4 cup (1/2 stick) cold unsalted butter, cubed
1/4 cup cold unrefined coconut oil (Spectrum Naturals makes a good one, in most health food stores and some supermarkets)
1/4 - 1/2 cup ice cold water

Combine flour, toasted coconut, sugar and salt in the bowl of a food processor and whir to mix.
Scatter cubes of butter into the flour mixture. Pulse to cut in. Add solidified coconut oil in 1 tsp chunks just as you did with the butter and pulse until mixture resembles wet sand. Add water, a little bit at a time, pulsing in between, until dough comes together when you squeeze a bit with your fingers. Form into a disk, wrap in plastic and chill for at least an hour, up to 2 days.

Preheat the oven to 400 degrees F. Roll the dough out on a floured surface into a 12-inch diameter round. Transfer it to a greased 9-inch pie plate and sculpt the edge into a uniform "upstanding ridge", basically a ridge that sticks out 1/2 inch past the edge of the plate. Chill in the freezer for 15 minutes.

Cover the crust in aluminum foil. Fill it with cheap small beans (to weigh down the crust so it doesn't shrink). Bake for 15 minutes, then remove the foil & beans and let them cool before discarding (I once made the mistake of dumping the hot beans into the trash. Everything was fine until I went to take the trash out, and then the beans came spilling out from all of the holes they'd melted in the bag!). Dock the crust well with a fork, twisting it slightly each time to make sure the holes stay open. Lower oven temp to 375 and bake for 15 minutes, or until golden brown. Remove from oven and cool completely.

Quadruple Coconut Cream Filling


1/2 cup sugar
1/4 cup cornstarch
1/8 tsp salt
14 oz. light coconut milk
1/2 cup 1% milk
4 large egg yolks
2 Tbsp unrefined coconut oil
1 tsp vanilla extract
1 tsp coconut extract
1 cup toasted coconut

Whisk the sugar, cornstarch, salt, coconut milk, milk and egg yolks together in a medium heavy-bottomed saucepan. Place over medium heat and cook, whisking constantly, until mixture thickens and comes to a boil (about 7 minutes). Continue to cook about another minute, then remove from heat and whisk in coconut oil, a tsp at a time. Then whisk in extracts and toasted coconut. Pour into the pie shell and start the meringue.

Toasted Coconut Meringue
4 egg whites at room temperature
1/4 tsp cream of tartar
5 Tbsp sugar
pinch of salt
1/2 tsp vanilla extract
1/2 tsp coconut extract
1/2 cup toasted coconut

Combine egg whites and cream of tartar in the bowl of a stand mixer. Beat on high speed until they start to get really foamy. Continue beating while adding sugar, one Tbsp at a time, salt and extracts. Continue to beat until stiff peak stage (when you tip a beater upside down, the whites form a peak that doesn't fall. Fold in coconut. Spread over the top of the pie, being sure to spread it to the edge of the crust, so that it seals to the crust and won't shrink back later.

Toast the meringue under the broiler until just golden. Cool to room temp, then refrigerate at least one hour before slicing. This pie is best eaten the day it's made (as if that is a problem!), but will keep about 2 days before the meringue starts weeping.

Saturday, April 11, 2009

Reaching Deep


I've never bought into the pizza argument. New Yorkers insist that pizza must be thin, with a chewy crust, moderate toppings and just a dab of sweet cooked tomato sauce under the cheese. Those who hail from Chicago insist on loading it up with a deep, rich crust, layers and layers of gooey cheese and sausage, topping it with a raw tomato sauce. In my mind, these are 2 different beasts entirely, and it's silly to disagree on which is the "real" pizza.

However, I must admit, this is my first attempt at deep dish. I've never been to the windy city, so this may be desperately unauthentic. Most of my pizzas have more closely resembled Neapolitan or New York style pizzas. And they're yummy! If you're not convinced, check out my summer veggie lover's with MD sweet corn, my Cobb salad creation, my Ratatouille Pizza and Buffalo Wing Steak Pizza, and an Amalfi coast seafood pizza. I'm actually shocked to see that my classic with pesto, fresh mozzarella and paper thin slices of tomato never made it onto these pages, but I guess that's due to its being camera shy as well as too incredibly delicious to wait for.

This pizza is everything the others are not. And yet, I wouldn't want it any other way. I slice = 1 huge meal, so be forewarned. Dig in to the deepest, ooey gooiest, crunchy and chewiest pizza ever!

Chicago - Style Deep Dish Pizza


Crust:
1 package rapid-rise yeast
1 cup warm water
1/8 cup vegetable oil
1/8 cup olive oil
1/4 cup yellow cornmeal
2 3/4 cups all-purpose flour
2 teaspoons kosher salt
2 tablespoons unsalted butter, slightly softened

Dissolve the yeast and water in the bowl of a mixer fitted with the paddle attachment. Add the oils and mix for 30 seconds. Add the cornmeal, 1 1/2 cups of the flour and salt and beat for 5 minutes. Switch to the dough hook and mix in the remaining 1 1/4 cups of flour and knead, using the dough hook for 2 minutes. Add the butter and knead until incorporated. The dough is a very moist dough so do not add more flour unless absolutely needed.

Place dough in an oiled bowl in a warm place to rise until doubled in size (about an hour).


Pizza Assembly:
1 1/2 large sweet onions, sliced (peppers would be good too, but I didn't have any)
1 1lb. italian sausage (I use hot turkey, but it's up to your preference)
2 Tbsp fresh oregano, chopped
1 Tbsp fresh thyme
1 Tbsp fresh rosemary, chopped fine
1 Tbsp fresh flat leaf parsley, chopped
pinch of hot pepper flakes
salt and pepper to taste
2 cloves garlic, minced
1 1/2 Tbsp dry sherry

8 oz shredded mozzarella cheese
2 14.5 oz cans of diced basil, garlic and oregano canned tomatoes, drained with most of their liquid squeezed out
1/4 cup shredded parmeggiano reggiano

Grease a 9 or 10 inch springform pan or a deep dish pizza pan. Preheat the oven to 425 F and arrange a rack on the lowest shelf in the oven.

Saute the onions in butter or olive oil until softened and slightly caramelized. Remove from the pan and set aside.

Add a little bit more olive oil and then add the sausage, removing it from the casing and breaking it up as it cooks. Add the seasonings and garlic and cook until just browned. Add sherry to deglaze the pan and cook until it's no longer watery.

Punch down the dough, roll it out a bit and press it into the pan, about 1/3 inch thick, cutting off any excess (which makes great garlic knots FYI!). Fill the bottom of the crust with 1/2 of the mozzarella cheese, follow with onions, then sausage mixture, then the other half of the cheese and top with the drained tomatoes. Finish with a sprinkling of parmesan and bake until crust is golden and a skewer inserted comes out warm (about an hour).


Removing from a springform pan is easy and I highly suggest using one. Eat immediately to make the most of the gooey cheesiness.

Friday, March 27, 2009

Return to Emilia-Romagna


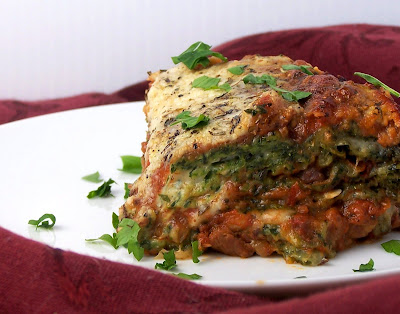
It's been a while since I had the time to post a Daring Baker's challenge, and for some reason I was still struggling with the whole make a vegan dip and cracker thing. However, there was no way I could pass up a lasagna challenge, and I was curious to see how it would measure up to my own ultimate recipe. The March 2009 challenge is hosted by Mary of Beans and Caviar, Melinda of Melbourne Larder and Enza of Io Da Grande. They have chosen Lasagne of Emilia-Romagna from The Splendid Table by Lynne Rossetto Kasper as the challenge. Lasagne is one of my favorite foods and I've traveled through this region of Italy and miss it incredibly. I was so looking forward to the memories I thought this would bring back.


Sadly, it was deeply disappointing. While my recipe may be less authentic, its layers of flavor are richer and more crowd pleasing. L and I agreed that while the meat ragu would have been fabulous on some pappardelle, its complexity was lost when mixed with the spinach of the noodles and the creaminess of the béchamel. Most surprising was how strikingly different it was from my usual version, even though I make my own fresh noodles and a béchamel in mine as well!


So my verdict is, if you want to experience the pleasures of slow cooking demanded by a traditional lasagne, give it a try. But for my time, it was not worth the 6 hours when 1 hour yields a better result!

Lasagne Verdi al Forno


Serves 8 to 10

1 recipe Spinach Pasta cut for lasagna (recipe follows)
1 recipe Parmesan Herb Béchamel (recipe follows)
1 recipe Country Style Ragu (recipe follows)
1 cup (4 ounces/125g) freshly grated Parmigiano-Reggiano

Preheat the oven to 350 degrees F. Grease a 3 quart shallow baking dish.


Spread a thin layer of béchamel over the bottom of the baking dish. Arrange a layer of about two long overlapping sheets of pasta over the béchamel. Spread a thin layer of béchamel (about 3 or 4 spoonfuls) over the pasta, and then an equally thin layer of the ragu. Sprinkle with about 1&1/2 tablespoons of the béchamel and about 1/3 cup of the cheese.


Repeat the layers until all ingredients are used, finishing with béchamel sauce and topping with a generous dusting of cheese.


Cover the baking dish lightly with foil, taking care not to let it touch the top of the lasagne. Bake 40 minutes, or until almost heated through. Remove the foil and bake another 10 minutes, or until hot in the center (test by inserting a knife – if it comes out very warm, the dish is ready). Turn off the oven, leave the door ajar and let the lasagne rest for about 10 minutes. Then serve.


Pasta Verde


In my opinion - this was the least tasty part of the lasagna - I recommend using a plain fresh egg noodle recipe, like the one I have here, but cut for lasagna

3 large eggs
6 ounces frozen chopped spinach, defrosted and squeezed dry - btw, the easiest way to do this is to stab the plastic bag all over with a fork, then squeeze so the water goes out the perforations - mess free!
3 1/2 cups all purpose unbleached flour


I used a Kitchen Aid mixer to make the dough, and its pasta attachment to roll it - however, the spinach was not about to mix in, even though it was finely chopped. I had to take it for a whir in the food processor.


Even after that, the dough did not roll out nicely. As soon as it got thin, the small bits of spinach would cause it to develop small holes everywhere, and it looked very lacy. When it cooked up, it was not very tasty and the texture was offputting.


Parmesan Herb Bechamel - my version

4 tablespoons unsalted butter
1 small shallot, minced fine
4 tablespoons all purpose unbleached flour
2 2/3 cups 1 % milk
3 Tbsp dried italian herbs
1/3 cup freshly grated parmaggiano reggiano
Salt and freshly ground pepper to taste
Freshly grated nutmeg to taste


Using a medium-sized saucepan, melt the butter over low to medium heat and quickly saute shallot until softened. Add the flour, whisk until smooth, and then stir (without stopping) for about 3 minutes. Whisk in the milk a little at a time and keep the mixture smooth, then add the herbs. Bring to a slow simmer, and stir 3 to 4 minutes, or until the sauce thickens. Cook, stirring, for about 5 minutes, until the sauce thickens. Season with cheese, salt, pepper, and a hint of nutmeg.

Ragu alla Contadina


This sauce was incredible on its own and would have been better if its flavors weren't masked by everything else. They called for grinding up the meat - but I left it in small 1/2 inch chunks and it braised to gorgeous melt-in-your-mouth pieces! I thought the slow addition of stock and the milk was odd, but it came out incredibly rich and flavorful because of it. This part I will definitely make again!

Makes enough sauce for 1 recipe fresh pasta or 1 pound/450g dried pasta)

3 tablespoons extra virgin olive oil
2 ounces, finely chopped (a slice about 1/2 inch thick will do nicely)
1 medium onion, minced
1 medium stalk celery, minced
1 large carrot, minced
8 ounces boneless veal shoulder
4 ounces beef skirt steak
2 ounces Prosciutto di Parma
2/3 cup dry red wine - I used Shiraz
2 & 1/2 cups chicken or beef stock (homemade if possible)
2 cups 1 % milk
1 can San Marzano crushed tomatoes
Italian herbs, Salt and freshly ground black pepper to taste

Browning the Ragu Base:
Heat the olive oil in a dutch oven over medium-high heat. Add the pancetta and minced vegetables and sauté, stirring frequently with a wooden spoon, 10 minutes, or until the onions barely begin to color. Stir meats into the pan and slowly brown over medium heat. First the meats will give off a liquid and turn dull grey but, as the liquid evaporates, browning will begin. Stir often, scooping under the meats with the wooden spatula. Protect the brown glaze forming on the bottom of the pan by turning the heat down. Cook 15 minutes, or until the meats are a deep brown.


Reducing and Simmering: Add the wine, lowering the heat so the sauce bubbles quietly. Stir occasionally until the wine has reduced by half, about 3 minutes. Scrape up the brown glaze as the wine bubbles. Stir 3/4 cup stock and let it bubble slowly, 10 minutes, or until totally evaporated. Repeat with another 3/4 cup stock. Stir in the last 1 cup stock along with the milk. Adjust heat so the liquid bubbles very slowly. Partially cover the pot, and cook 1 hour. Stir occasionally to check for sticking.

Add the tomatoes and herbs. Cook uncovered, at a very slow bubble for another 45 minutes, or until the sauce resembles a thick, meaty stew. Season with salt and pepper.


Working Ahead?
The ragu and the béchamel sauce can be made up to three days ahead. The ragu can also be frozen for up to one month. The pasta can be rolled out, cut and dried up to 24 hours before cooking. The assembled lasagne can wait at room temperature (20 degrees Celsius/68 degrees Fahrenheit) about 1 hour before baking. Do not refrigerate it before baking, as the topping of béchamel and cheese will overcook by the time the center is hot.


Related Posts with Thumbnails