Showing posts with label Entree. Show all posts

Thursday, July 21, 2011

Orange Saffron Scallops


I would venture to say I had never had a true scallop experience until I was in college.  Although not a true scallop virgin, before that I remember them (usually the tiny frozen bay variety) as rubbery, tasteless little orbs and I was definitely not a fan.  (Sorry Mom)

But all of that was about to change.  Thankfully, a veil was lifted from my bivalvian ignorance.  There's a great little restaurant in my husband's hometown that has always been one of our favorites.  As an undergrad, one of these frequent visits involved my companion ordering a simple dish of fried sea scallops. Since I was at that 20-something-and-realizing-how-little-I-know stage I decided to try one when offered and was immediately blown away by the slightly sweet, salty and tender quality.  And my love affair with the scallop started then and there.


Since I was currently immersing myself in all things food related, it wasn't long until I came across the preparation that is the holy grail of scallopdom, searing juicy fresh scallops in butter until they're golden brown on each side and just barely cooked through.  It quickly skyrocketed to my favorite meal of all time and seems to be the one item on any restaurant menu I cannot resist, even when the other options are more creative and something I might not be able to make myself.

Ever since my scallop enlightenment, I've indulged myself in a seared scallop dish about once a month.  Today that treat involved a rich sauce and some buttery rice (which I've had the oddest craving for) with the Spanish flavors of saffron and orange.

Pan Seared Scallops Over Rice with Orange Saffron Sauce


Be sure to ask for dry scallops that have never been frozen.  Other varieties contain too much water and won't sear nicely.  Size does matter, so go for sea scallops over the petite bay version, but it's not necessary to shell out the big bucks for U10s (at only 10 per pound they're huge!) and I find that those cook too unevenly anyway.  A medium to large scallop about an inch thick is your best bet.


I don't recommend a nonstick pan for this particular recipe.  For even browning and the lovely caramelized bits that make the sauce so tasty you really need a stainless steel or anodized aluminum surface.


Serves 2 with some leftover rice.

Sauce:
1 cup chicken stock (homemade is best)
1/3 cup heavy cream
pinch of saffron
zest of one orange
1 Tbsp butter
salt and pepper to taste (be sure to wait until the end to season)

Rice:
2 cups chicken stock
zest and juice of an orange
pinch of saffron
4 Tbsp butter, divided
1 tsp salt
1 cup jasmine rice
1 cup mixed fresh or frozen veggies of your choice (I like the sweetness of peas and corn with scallops)
3 Tbsp basil leaves, rolled up together and sliced thin (chiffonade)

Scallops:
18 medium-large scallops (about 3/4 lb.)
1 Tbsp butter
1 tsp olive oil

To get the sauce started, combine chicken stock, cream, saffron and orange zest in a small saucepan (I use one called a butter warmer because it really only needs to hold about 1 1/2 cups).  Bring to a simmer over medium heat and reduce to about half the original volume while you cook everything else.  When ready, it will coat the back of a metal spoon.

Meanwhile, combine chicken stock, orange juice and zest, saffron, salt and 2 Tbsp of butter to a boil in a medium saucepan.  Add the rice, stir and reduce the heat to low.  Cover, stirring occasionally to cook according to package instructions.  In the last 5 minutes of cooking time, add the veggies.  Add the basil right before serving.

While your rice cooks and sauce reduces, preheat a skillet over medium high heat with the butter and olive oil to get ready to sear your scallops.  Pat the scallops dry with paper towels and check to make sure the abductor muscle (a tough little bit) has been removed.  When the butter starts to sizzle (but not smoke) place your scallops in the pan with one of the flat sides down.  If you've dried the scallops enough and your pan is nice and hot you should hear them sizzle immediately.  Cook until golden on one side (usually 2-3 minutes), then flip and repeat.  When all of the scallops are golden on both sides and opaque remove them from the pan.  (Smaller ones are usually done first so I do this incrementally).

To finish, deglaze the pan with your reduced sauce.  Let it bubble away over medium high heat as you scrape all those caramelized yummy bits off the bottom of the pan.  I skipped this step the first time I made this recipe and what a waste that was!  When the sauce becomes thick and turns more golden brown than it's original peachy color, it's ready.

Serve scallops atop a bed of rice with a drizzle of sauce over them.

Saturday, July 2, 2011

Rhody Style Clam Cakes


Why hello there!  Yes it's been a while.  But no time for apologies, no time for explanation, I'm just glad you're still here.

Let me tell you about something incredible.  Something that defines me.  Something like Dell's, coffee milk, Rocky Point, Portuguese sweet bread and clam bakes.  It's a food so dear to Rhode Islander's hearts that eating it brings back visions of lopsided tables sinking into the sand on a Block Island beach with a Jimmy Buffet tribute band playing in the background.  And it's virtually unknown outside of the state!

Behold the clam cake!  More of a fritter than a cake, it's sort of like a hush puppy embedded with salty, sweet & tender clam meat.  Light and fluffy inside, with a crisp exterior and little bits of pleasantly chewy clams.  They're great alongside a bowl of chowder (white of course!  is there any other kind?) or with a squeeze of lemon or dash of hot sauce.  This is the flavor of the Narragansett Bay in summertime.  Perfect for this Independence day weekend!

Clam Cakes

Adapted from the Clam Fritter recipe by Craig Claiborne of the NYTimes as posted on One Perfect Bite


Use a large and flavorful clam for this dish.  Since you're chopping them anyway, you don't need to shell out the extra money for tender cherrystones or littlenecks.  Furthermore, they won't quite deliver the flavor of the larger clams.

approximately 2 dozen fresh quahog or mahogany clams (should yield about 2 1/2 cups clam meat)

2 eggs
1 Tbsp fresh lemon juice
1/3 cup reserved clam juice
1/4 cup 2% milk
1 Tbsp melted butter
zest of 1/2 a lemon
pinch of cayenne pepper
1 tsp garlic powder
1 1/2 tsp salt
1 tsp freshly ground black pepper
3/4 cup all purpose flour
1/4 cup finely ground yellow cornmeal
1 tsp baking soda
2 tsp baking powder
1/4 cup finely chopped fresh flat leaf parsley

vegetable oil

Rinse the clams under cold water and pile into a stockpot.  Add about 1/2 an inch of water to the bottom of the pot and bring to a boil over medium high heat.  Cover and reduce heat to low.  Simmer only until clams have started to open.  Stir to allow more to open and simmer covered briefly until the majority have opened up.  Allow to cool slightly

Remove the clam meat to a cutting board and discard all shells and unopened clams.  Coarsely chop the clam meat and set aside.  Strain the clam juice through a coffee filter to remove the grit.  Some of this will be used later.  Don't throw away the rest!  It's great in chowders and other soups and it freezes beautifully!

Whisk together eggs, lemon juice, 1/3 cup of clam juice, milk, butter, zest and seasonings.  Sift in flour, cornmeal, baking soda and baking powder and stir until just combined.  Add chopped clams and parsley and stir until well distributed.

Fill a heavy cast iron skillet to about a 1/2 inch depth with vegetable oil.  Preheat the oil over medium high heat until it is hot but not smoking.  At the right temperature the handle of a wooden spoon will bubble when held in the oil.  Dollop the batter into the oil about 2 Tbsp at a time, leaving plenty of room in between the cakes.  Fry about 2 minutes on each side, until golden brown and crisp on the outside and light and fluffy inside.


Drain on paper towels and season with sea salt while still hot.  Serve with lemon slices or hot sauce.

Thursday, August 13, 2009

Dinner's Going Green


"Green" - it's no longer just a color, it's a catchphrase for easy environmental fixes. One thing is for sure, we've abused our planet for a long time, selfishly exploiting its resources, and now it's fighting back. We're entering a period of consequences, and unfortunately we are not yet rising to the challenge in a way that will ensure our future. Green has become the word of the moment, but only for baby steps. As much as every little bit counts, baby steps will not take us the miles we need to go before time runs out.

Hot, Flat and Crowded is a fantastic book about the challenges we are facing and the best ways to rise up and seize the American entrepreneurial spirit to reduce the effects of our dependence on fossil fuels. I highly recommend it to everyone, since this is an issue we will all have to face. I hope President Obama has read it as well. If America leads the world towards higher efficiency standards and cleaner fuels, the world will follow, and probably respect us a little more as well.

As for steps we all can take without the government's help, green baby steps are still better than a lack of forward motion. Energy star appliances, SMALL hybrid cars, reusable grocery bags and compact florescent bulbs are tremendously helpful in cutting CO2 admissions when everyone starts to use them. Reducing electricity use, by using power strips that cut power to appliances and chargers when not in use and driving less are a huge help. We have only used the air conditioner in our house a handful of days this summer. A little sweat has paid off with more money in our pockets.

CSAs are a great way for foodies to be a little more green. Community supported agriculture means food travels only a few miles from farm to table, drastically reducing its carbon footprint. Plus local small farms stay solvent, not caving to sell their valuable land to developers of McMansion complexes. And we get the freshest produce possible, so everyone wins. One Straw Farm gives me so much organic produce that I've only had to go grocery shopping once since school let out. Which has meant way less miles on my car and way more money in my pocket.

So here's a green meal with a green sauce that will rock your taste buds and get you going on a greener path to change.

Grilled Stuffed Patty Pan Squash and Fish with Salsa Verde


Grilled Salsa Verde
4-5 tomatillos, husked and washed then halved
2 tomatoes, washed and halved
1 small red onion, halved
1 jalapeno
2 Tbsp lime juice
1/4 cup chopped cilantro

Preheat a grill to high heat. Brush the tomatillos, tomatoes, onion and jalapenos with vegetable oil. Grill them all over high heat until tomatillos and tomatoes are carmelized and onion and jalapeno are charred. Chop up the tomatillos, tomatoes and onion. Seed and stem the jalapeno and mince. Toss them all with lime juice and cilantro. Let sit for 15 minutes for flavors to meld. (Leave the grill on low for the squash.

Stuffed Squash
2 cups chicken stock
1 Tbsp lime juice
1 Tbsp butter
3/4 cup white rice
1 Tbsp chile powder
1 tsp cumin
1 Tbsp chopped cilantro
1/2 cup shredded mexican cheese

6 medium patty pan squash

Bring chicken stock, lime juice and butter to a boil in a medium saucepan. Add rice and spices and reduce to low. Cover and cook until rice has absorbed the water, and is al dente, about 20 minutes. Toss in about a third of the salsa verde and the rest of the cilantro along with the cheese.

While you're waiting for the rice to cook, slice the tops off of the patty pans and hollow out the insides with a spoon. Brush the squash with olive oil and put top side down on the covered grill to cook and char a bit. After the tops are charred, stuff with rice and put back on the grill, but right side up this time. Cook until tender and evenly charred.


Finishing it off...
2 (1/3 lb.) filets of firm white fish, such as halibut or cod

Brush the fish with vegetable oil and season well with salt and pepper. Grill over high heat until just cooked - about 2 minutes per side for thick filets. Serve over remaining rice with squash on the side and salsa on top.

Ducking Out


Duck was a common thread throughout my childhood. It was the go-to dish in my father's restaurant repertoire, whether it was orangey Siam duck at our favorite Asian restaurant (the miniscule thai, vietnamese, cambodian hybrid Gourmet House in Providence), the rich duck leg with port sauce at Chardonnays (my favorite restaurant of all time), in tiny drumstick form at that abhorrently expensive fancy-pants terrace in Nova Scotia or any other fine establishment where it popped up on the menu. I guess some kids must think of duck as something you feed at the park and chase around, but I knew better. That was one tasty bird! So while my friends did (and often still do) squirm and squeal at the thought, I relish my duck to myself. Unfortunately I've still managed to convert some along the way, which just means less duck for me.

My husband is a prime example of this. He'd never even considered trying duck until I convinced him to take a bite of the aforementioned Siam version. Now he orders it as often as my father did. I cooked my first duck at home for my first dinner party, and it became one of my first recipes on this site. It was nerve-racking and time-consuming and I've since learned to be smarter about cooking for a crowd, but it was delicious. It didn't deter me from trying again, and subsequent projects have led to successes that include the rich duck broth that graced my soup dumplings.

When honeymooning at Lone Mountain Ranch (which I HIGHLY recommend in every facet - but especially for the food), duck came up on the menu a couple of times. Our first night we lingered for 3 hours over the best meal of my life so far which of course included a seared duck breast and leg of duck confit with a cherry demi-glace. (Of course they outdid themselves with my new best meal ever on our last night with prosciutto wrapped quail over herbed spätzle - but that's a story for another time). Later meals also included duck confit crepes and a huckleberried version.

So as you can see, duck and I go way back. In all truth, our relationship is better when we just meet for dinner with little foreplay. But I've found a way around it. You get succulent, flavorful duck with crispy skin and tender flesh in relatively little time with almost no work. This is the way to do duck at home - on the grill with a sticky sweet glaze! Give it a try - or on second thought, maybe you shouldn't! More for me that way! :)

Grilled Duck with Gingered Sticky Glaze


Spice Rub
2 Tbsp ground ginger
1 Tbsp garlic powder
1 tsp ground coriander
1 tsp 5 spice powder
1 tsp black pepper
1 1/2 tsp salt
2 Tbsp brown sugar

Combine all ingredients and mix well.

Glaze
1/4 cup orange blossom honey
1/4 cup somewhat bitter marmalade
1/4 cup cream sherry
2 tablespoons grated ginger
1 Tbsp finely minced garlic
an orange - zest removed with a veggie peeler and juice squeezed and reserved
1 cinnamon stick
1 bay leaf

Combine honey, marmalade, orange juice and sherry in a small saucepan over medium heat until they start to melt and blend together. Add ginger, garlic, orange zest, cinnamon stick and bay leaf and bring to a simmer. Reduce until very thick (easily coats a spoon without running off.) Let cool.

And now...the duck itself!
1 4-5 lb. duck
1 orange, quartered
1 sweet onion, peeled and quartered

Preheat the grill (gas or charcoal) to a low indirect heat of about 300 to 325 F. If you are using charcoal, gather the coals to both sides and put a drip pan under the middle to cook the duck over. If you are using gas, use only the outer burners and place a drip pan directly under the grate.

Remove any visible fat or pin feathers from your duck, give it a good rinse and pat dry with a paper towel. Prick the skin all over with a sharp knife, taking care to just go through the skin and not into the meat. Rub the skin and the inside of the cavity with the spice rub. Stuff the cavity with alternating pieces of orange and onion.

Place the duck over the drip pan on the unheated side of the grill. Close the lid and cook for one hour, rotating halfway. Check to make sure the duck is cooking evenly and the drip pan is not overflowing. Cook for another half hour, rotating after 15 minutes or until sin is starting to get crispy. Brush with glaze, rotate and cook for 10 minutes at a time, repeating until the temperature of the thigh meat reaches 155 F. At that point, remove from the heat, cover with foil and let rest for 10 minutes before serving.

Tuesday, August 4, 2009

Prosciutto = Happiness


When I was in college at University of Rhode Island my (now) husband (!) and I had our first vacation together. It wasn't just anywhere - we were lucky enough to snag a 10 day trip to the Amalfi Coast of Italy for only about $1300 a person. The cliffs rising from crystal blue waves, towns climbing up their craggy corners and roads racing through narrow crevices redefined our ideas of beauty. And I don't need to tell you how amazing the food was! Italian ideals of simple food cooked with respect from the finest ingredients made every dish unforgettable.

We had always planned to be married in Positano, at a little church on the very top of the cliff, looking out over the water. Unfortunately that was not feasible, since the Euro is now putting the dollar to shame. Not to be outdone, we picked a place just as special to us - the site of our first date - Colt State Park in beautiful Bristol, Rhode Island. We got our ocean views, mild weather and a little taste of Italy (yes, I did about 1/2 the cooking!), but it still leaves us just a little "homesick" for the place where our souls reside. This pizza has helped to bridge the gap - pulling Amalfi flavors into our American existance.

Arugula Prosciutto Pizza


Prepared Pizza Dough
6 oz pesto (try this one or use storebought - but first drain off excess oil and reserve for another use)
1 lb fresh mozzarella, sliced thin
1/4 cup parmesan cheese

2 1/2 cups arugula, rinsed and dried
2 Tbsp good Italian dressing
1 lb prosciutto - sliced paper thin


Preheat the oven to 500 degrees with a 16 inch pizza stone on the middle rack.

Roll out the dough to a thin 16 inch round. Remove the pizza oven from the oven and rest on the stovetop (with burners turned off!). Drape dough over the stone. Let the dough cook on the stone (still on the stovetop) until the bottom is no longer sticky. Flip pizza so the cooked side is up. Spread with pesto and top with slices of mozzarella, sprinkle with parmesan.

Return pizza to oven and bake until cheese is melted and crust is crispy - about 15-20 minutes. In the meantime, toss arugula with dressing.

Remove pizza from oven and top with arugula and little piles of prosciutto. Cut and enjoy!

Sunday, April 12, 2009

In Search of the Egg


When I was a child Easter was a magical holiday. My father was the master of the Easter Egg Hunt. Now, I'm not talking close your eyes and i'll hide some eggs, then you scuttle around trying to find them before your bratty little brother. I'm talking personalized clues for both of us, made weeks in advance, hidden in candy filled eggs. We had to decipher the clue in order to find the next one, and hours later eventually find the treasure trove in a basket somewhere we never would have looked. The hunt began in an Easter egg suspended by ribbon just above our pillows, so when we woke up it we couldn't miss it.

To this day my dad insists that it was just a ploy to buy him a couple more hours of sleep. And although God knows a man who commuted 2 hours each way every weekday and traveled several times a month needed all the sleep he can get, I know it was a lousy excuse. He loved how happy it made us, how we felt like pirates searching for lost treasure and seeing our beaming faces all day long, straight through church service and on through dinner, even with the dreaded brussel sprouts. I think Easter was the one holiday my father actually enjoyed. His parents divorced over the winter holidays and so his memories are not so pleasant. But on Easter he would arise to our cheers and looting of our baskets and make a plate of deviled eggs and leisurely read the paper before we got dressed up and prepared for the day's festivities.

Now that we've all grown up and gone, I hope he still lingers in the window seat with his morning coffee and his thoughts drift back to days gone by, as mine have this morning. I hope it brings a smile to his face. Here's to you dad, and here's what I would cook for Easter.

BRUNCH


Bacon Cheddar Scallion Quiche
Quiche is the perfect brunch dish. Here's why: 1 - you can make it with almost anything, any leftover meats and veggies you can scrounge up. 2 - It reheats beautifully (not to mention it's also good cold), making it the perfect make ahead dish. This was always a favorite of my dad's, although on easter, it would have been deviled eggs, probably with the hard boiled ones we dyed the day before. The ricotta may sound out of place, but it lends a delightful creaminess to the quiche, especially when left in small chunks. If this one doesn't suit your mood, try Cajun quiche instead.


1 store bought refrigerated pie crust
8 oz shredded sharp 2% cheddar cheese
5 slices bacon, crisp cooked
1/4 cup ham chunks (optional)
5 small scallions, white and green parts sliced thin
1/2 cup fat free ricotta
8 eggs
1/4 cup 1% milk
salt and pepper to taste

Preheat the oven to 375 F, with a rack on the lowest shelf. Roll out pie dough and press into a greased 10 inch tart pan. Spread half the cheddar over the bottom of the crust. Sprinkle on bits of the bacon, ham and scallion. Dollop the ricotta in about a tablespoon at a time. Top with remaining cheddar. Beat the eggs with the milk until well combined, then pour over the fillings. Sprinkle the top with salt and pepper.

Bake on the bottom rack until crust and top is slightly golden and filling is set, about 45 minutes.

DINNER


Root Beer Baked Glazed Ham over Carrots
I can't believe that a glazed ham has not yet graced these pages, since it's one of my standybys, especially for large gatherings. However, upon making it I can see why, it's not very photogenic. It is darn tasty though. Buy a ham that actually looks like it came off of a pig, with the bone in, and not one of those pressed monstrosities. I prefer the shank end, and try to make sure it doesn't have water added if you can. Do not bother with spiral sliced - they dry out easily and it's really not that hard to slice a ham.

1 small bag baby carrots
10-15 pound half ham, bone in
cloves
1 1/2 cups root beer
1 1/2 Tbsp whole grain mustard
1 Tbsp vinegar from a jar of hot pickled peppers (or white vinegar)
1 Tbsp maple syrup
2 Tbsp bitter orange marmelade (British if possible)
1 tsp Worcestershire sauce
1/2 tsp liquid smoke (optional)
1 tsp soy sauce
1 cinnamon stick
1 bay leaf
1 tsp chile powder
1 tsp smoked paprika
1 tsp black pepper

Preheat oven to 325 F.

In a 13 x 9 glass baking dish, line the bottom with a layer of carrots. Trim the ham of any hard rind and place flat side down on top of carrots. Use a clean utility knife open to the second click (you can use a regular knife, but be really careful about the depth of the cut) to cut a diamond pattern into the ham. It should cut through the fat without cutting much of the meat. Stud the corners of the diamonds with cloves. Pour 1 cup of root beer into the dish and bake on the bottom rack for 1 hour and 15 minutes, basting every 15 minutes.


Meanwhile, make the glaze by combining the remaining ingredients in a small saucepan. Bring to a boil and reduce liquids to a thick syrupy consistency over medium heat. Remove cinnamon stick and bay leaf before using.

After the first round of baking, remove the ham from the oven, insert an oven safe thermometer - I like the probe kind that has a digital reader outside of the oven - and brush on the glaze (you won't use it all right away). Return to the oven and bake, brushing with glaze every 15 minutes, until internal temperature reaches 140 degrees F. Remove from oven and let sit 10 minutes before slicing. Serve any leftover glaze on the side for guests to brush on individual slices if they choose.

Serve with the carrots (which take on a fabulous flavor from the pan juices) and corn bake.

Saturday, April 11, 2009

Reaching Deep


I've never bought into the pizza argument. New Yorkers insist that pizza must be thin, with a chewy crust, moderate toppings and just a dab of sweet cooked tomato sauce under the cheese. Those who hail from Chicago insist on loading it up with a deep, rich crust, layers and layers of gooey cheese and sausage, topping it with a raw tomato sauce. In my mind, these are 2 different beasts entirely, and it's silly to disagree on which is the "real" pizza.

However, I must admit, this is my first attempt at deep dish. I've never been to the windy city, so this may be desperately unauthentic. Most of my pizzas have more closely resembled Neapolitan or New York style pizzas. And they're yummy! If you're not convinced, check out my summer veggie lover's with MD sweet corn, my Cobb salad creation, my Ratatouille Pizza and Buffalo Wing Steak Pizza, and an Amalfi coast seafood pizza. I'm actually shocked to see that my classic with pesto, fresh mozzarella and paper thin slices of tomato never made it onto these pages, but I guess that's due to its being camera shy as well as too incredibly delicious to wait for.

This pizza is everything the others are not. And yet, I wouldn't want it any other way. I slice = 1 huge meal, so be forewarned. Dig in to the deepest, ooey gooiest, crunchy and chewiest pizza ever!

Chicago - Style Deep Dish Pizza


Crust:
1 package rapid-rise yeast
1 cup warm water
1/8 cup vegetable oil
1/8 cup olive oil
1/4 cup yellow cornmeal
2 3/4 cups all-purpose flour
2 teaspoons kosher salt
2 tablespoons unsalted butter, slightly softened

Dissolve the yeast and water in the bowl of a mixer fitted with the paddle attachment. Add the oils and mix for 30 seconds. Add the cornmeal, 1 1/2 cups of the flour and salt and beat for 5 minutes. Switch to the dough hook and mix in the remaining 1 1/4 cups of flour and knead, using the dough hook for 2 minutes. Add the butter and knead until incorporated. The dough is a very moist dough so do not add more flour unless absolutely needed.

Place dough in an oiled bowl in a warm place to rise until doubled in size (about an hour).


Pizza Assembly:
1 1/2 large sweet onions, sliced (peppers would be good too, but I didn't have any)
1 1lb. italian sausage (I use hot turkey, but it's up to your preference)
2 Tbsp fresh oregano, chopped
1 Tbsp fresh thyme
1 Tbsp fresh rosemary, chopped fine
1 Tbsp fresh flat leaf parsley, chopped
pinch of hot pepper flakes
salt and pepper to taste
2 cloves garlic, minced
1 1/2 Tbsp dry sherry

8 oz shredded mozzarella cheese
2 14.5 oz cans of diced basil, garlic and oregano canned tomatoes, drained with most of their liquid squeezed out
1/4 cup shredded parmeggiano reggiano

Grease a 9 or 10 inch springform pan or a deep dish pizza pan. Preheat the oven to 425 F and arrange a rack on the lowest shelf in the oven.

Saute the onions in butter or olive oil until softened and slightly caramelized. Remove from the pan and set aside.

Add a little bit more olive oil and then add the sausage, removing it from the casing and breaking it up as it cooks. Add the seasonings and garlic and cook until just browned. Add sherry to deglaze the pan and cook until it's no longer watery.

Punch down the dough, roll it out a bit and press it into the pan, about 1/3 inch thick, cutting off any excess (which makes great garlic knots FYI!). Fill the bottom of the crust with 1/2 of the mozzarella cheese, follow with onions, then sausage mixture, then the other half of the cheese and top with the drained tomatoes. Finish with a sprinkling of parmesan and bake until crust is golden and a skewer inserted comes out warm (about an hour).


Removing from a springform pan is easy and I highly suggest using one. Eat immediately to make the most of the gooey cheesiness.

Friday, March 27, 2009

Return to Emilia-Romagna


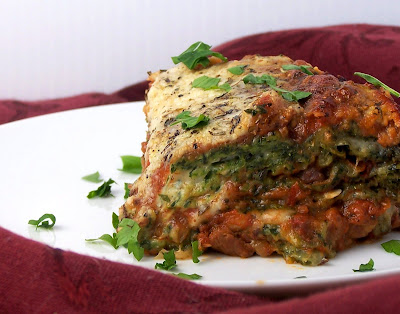
It's been a while since I had the time to post a Daring Baker's challenge, and for some reason I was still struggling with the whole make a vegan dip and cracker thing. However, there was no way I could pass up a lasagna challenge, and I was curious to see how it would measure up to my own ultimate recipe. The March 2009 challenge is hosted by Mary of Beans and Caviar, Melinda of Melbourne Larder and Enza of Io Da Grande. They have chosen Lasagne of Emilia-Romagna from The Splendid Table by Lynne Rossetto Kasper as the challenge. Lasagne is one of my favorite foods and I've traveled through this region of Italy and miss it incredibly. I was so looking forward to the memories I thought this would bring back.


Sadly, it was deeply disappointing. While my recipe may be less authentic, its layers of flavor are richer and more crowd pleasing. L and I agreed that while the meat ragu would have been fabulous on some pappardelle, its complexity was lost when mixed with the spinach of the noodles and the creaminess of the béchamel. Most surprising was how strikingly different it was from my usual version, even though I make my own fresh noodles and a béchamel in mine as well!


So my verdict is, if you want to experience the pleasures of slow cooking demanded by a traditional lasagne, give it a try. But for my time, it was not worth the 6 hours when 1 hour yields a better result!

Lasagne Verdi al Forno


Serves 8 to 10

1 recipe Spinach Pasta cut for lasagna (recipe follows)
1 recipe Parmesan Herb Béchamel (recipe follows)
1 recipe Country Style Ragu (recipe follows)
1 cup (4 ounces/125g) freshly grated Parmigiano-Reggiano

Preheat the oven to 350 degrees F. Grease a 3 quart shallow baking dish.


Spread a thin layer of béchamel over the bottom of the baking dish. Arrange a layer of about two long overlapping sheets of pasta over the béchamel. Spread a thin layer of béchamel (about 3 or 4 spoonfuls) over the pasta, and then an equally thin layer of the ragu. Sprinkle with about 1&1/2 tablespoons of the béchamel and about 1/3 cup of the cheese.


Repeat the layers until all ingredients are used, finishing with béchamel sauce and topping with a generous dusting of cheese.


Cover the baking dish lightly with foil, taking care not to let it touch the top of the lasagne. Bake 40 minutes, or until almost heated through. Remove the foil and bake another 10 minutes, or until hot in the center (test by inserting a knife – if it comes out very warm, the dish is ready). Turn off the oven, leave the door ajar and let the lasagne rest for about 10 minutes. Then serve.


Pasta Verde


In my opinion - this was the least tasty part of the lasagna - I recommend using a plain fresh egg noodle recipe, like the one I have here, but cut for lasagna

3 large eggs
6 ounces frozen chopped spinach, defrosted and squeezed dry - btw, the easiest way to do this is to stab the plastic bag all over with a fork, then squeeze so the water goes out the perforations - mess free!
3 1/2 cups all purpose unbleached flour


I used a Kitchen Aid mixer to make the dough, and its pasta attachment to roll it - however, the spinach was not about to mix in, even though it was finely chopped. I had to take it for a whir in the food processor.


Even after that, the dough did not roll out nicely. As soon as it got thin, the small bits of spinach would cause it to develop small holes everywhere, and it looked very lacy. When it cooked up, it was not very tasty and the texture was offputting.


Parmesan Herb Bechamel - my version

4 tablespoons unsalted butter
1 small shallot, minced fine
4 tablespoons all purpose unbleached flour
2 2/3 cups 1 % milk
3 Tbsp dried italian herbs
1/3 cup freshly grated parmaggiano reggiano
Salt and freshly ground pepper to taste
Freshly grated nutmeg to taste


Using a medium-sized saucepan, melt the butter over low to medium heat and quickly saute shallot until softened. Add the flour, whisk until smooth, and then stir (without stopping) for about 3 minutes. Whisk in the milk a little at a time and keep the mixture smooth, then add the herbs. Bring to a slow simmer, and stir 3 to 4 minutes, or until the sauce thickens. Cook, stirring, for about 5 minutes, until the sauce thickens. Season with cheese, salt, pepper, and a hint of nutmeg.

Ragu alla Contadina


This sauce was incredible on its own and would have been better if its flavors weren't masked by everything else. They called for grinding up the meat - but I left it in small 1/2 inch chunks and it braised to gorgeous melt-in-your-mouth pieces! I thought the slow addition of stock and the milk was odd, but it came out incredibly rich and flavorful because of it. This part I will definitely make again!

Makes enough sauce for 1 recipe fresh pasta or 1 pound/450g dried pasta)

3 tablespoons extra virgin olive oil
2 ounces, finely chopped (a slice about 1/2 inch thick will do nicely)
1 medium onion, minced
1 medium stalk celery, minced
1 large carrot, minced
8 ounces boneless veal shoulder
4 ounces beef skirt steak
2 ounces Prosciutto di Parma
2/3 cup dry red wine - I used Shiraz
2 & 1/2 cups chicken or beef stock (homemade if possible)
2 cups 1 % milk
1 can San Marzano crushed tomatoes
Italian herbs, Salt and freshly ground black pepper to taste

Browning the Ragu Base:
Heat the olive oil in a dutch oven over medium-high heat. Add the pancetta and minced vegetables and sauté, stirring frequently with a wooden spoon, 10 minutes, or until the onions barely begin to color. Stir meats into the pan and slowly brown over medium heat. First the meats will give off a liquid and turn dull grey but, as the liquid evaporates, browning will begin. Stir often, scooping under the meats with the wooden spatula. Protect the brown glaze forming on the bottom of the pan by turning the heat down. Cook 15 minutes, or until the meats are a deep brown.


Reducing and Simmering: Add the wine, lowering the heat so the sauce bubbles quietly. Stir occasionally until the wine has reduced by half, about 3 minutes. Scrape up the brown glaze as the wine bubbles. Stir 3/4 cup stock and let it bubble slowly, 10 minutes, or until totally evaporated. Repeat with another 3/4 cup stock. Stir in the last 1 cup stock along with the milk. Adjust heat so the liquid bubbles very slowly. Partially cover the pot, and cook 1 hour. Stir occasionally to check for sticking.

Add the tomatoes and herbs. Cook uncovered, at a very slow bubble for another 45 minutes, or until the sauce resembles a thick, meaty stew. Season with salt and pepper.


Working Ahead?
The ragu and the béchamel sauce can be made up to three days ahead. The ragu can also be frozen for up to one month. The pasta can be rolled out, cut and dried up to 24 hours before cooking. The assembled lasagne can wait at room temperature (20 degrees Celsius/68 degrees Fahrenheit) about 1 hour before baking. Do not refrigerate it before baking, as the topping of béchamel and cheese will overcook by the time the center is hot.


Saturday, March 21, 2009

Buffalo Blues


Orzo has to be one of my favorite pasta shapes. Like grains of rice, they can be toasted and turned into creamy sides reminiscent of risotto. Or a quick boil, drain and toss of vinaigrette with some seasonal veggies and you've got yourself a great pasta salad. But the best of all is an uber creamy better-than-mac-and-cheese studded with bits of sausage or meatballs. This version draws its charms from the classic buffalo wing and blue cheese combo. Perfect for a football game or a cozy winter night (and I actually made this around superbowl time).

Buffalo Blue Creamed Orzo with Turkey Meatballs


1 lb. orzo pasta

1 Tbsp butter
1 cup chopped sweet onion
1 cup chopped crimini mushrooms
1/4 cup all purpose flour
1 1/2 cups chicken or turkey broth or stock, preferably low sodium or homemade
1 cup 1% milk
1/4 cup Frank's Red Hot sauce
2/3 cup mild blue cheese crumbles
1 bag triple washed baby spinach (about 5 cups)
1 1/2 cups chopped ripe plum tomato
1/2 recipe turkey meatballs (recipe below)

Bring a large pot of water to a boil and salt heavily. Cook pasta according to package directions, undercooking by one minute so it's still a little chewy and drain.

Meanwhile, melt butter in a large deep saucepan. Saute onions and mushrooms until slightly golden. Add broth and 1/2 cup milk and bring to a low simmer. In a small lidded container, shake together flour and remaining milk until flour is no longer clumping to make a slurry. Add to the sauce along with hot sauce, spinach and blue cheese. Let simmer until thick and cheese has melted. Toss in orzo, tomatoes and meatballs and serve immediately.


Turkey Meatballs


1 lb. ground turkey breast
1/2 cup seasoned breadcrumbs
1/2 cup grated parmeggiano reggiano
3 Tbsp chopped parsley

Mix together with your hands to combine. Form into small meatballs, about an inch in diameter. If freezing, do that now on a sheet pan lined with plastic wrap, then transfer to a plastic bag after frozen solid.

To cook, brown all sides in a pan with olive oil over medium heat.
Related Posts with Thumbnails