Showing posts with label Holiday. Show all posts

Saturday, November 21, 2009

Looking Forward to Leftovers...Part I


With all of the work that goes into making every Thanksgiving perfect, you deserve to be reaping the benefits for the following week. Yet all too often, leftovers just turn into turkey sandwiches and other monotonous duplicate meals, and after a few days you're sick and tired of reheat and reeat the same old thing, and you're ordering pizza while the leftovers languish and spoil in the back of the fridge. In the spirit of frugalness, in a waste not want not economy, we need to bring these leftovers to an unexpected place, where they will be transformed from the lovely but boring feast day foods into unrecognizable reincarnations. I hope that this series, which I will post throughout the week, will inspire you to think outside the leftover box, and enjoy your post-Thanksgiving time care free.

These waffles make use of leftover sweet potatoes or squash (both work well). If your leftover sweet potatoes aren't already mashed, just puree them first in a blender or food processor. Don't bother picking out nuts or marshmallows or whatever you like to put in, just puree it all together. Spices, even odd ones, taste great in this recipe so no worries about that either.

Since I have a full house (literally - no walking room) of guests from afar for most Thanksgivings, breakfast the day after is just as important to plan for as the big meal itself. It's a final send off for my guests and it needs to be filling enough that they can get through the 6-8 hour drive with minimal stops, but not so heavy that they want to fall asleep at the wheel. These waffles, drizzled with dark amber maple syrup and served with a pumpkin spice latte, fit the bill perfectly.


Apple, Pecan & Sweet Potato Waffles

3 large eggs
3/4 cup milk
1/4 cup melted butter
1 cup leftover mashed or pureed sweet potatoes or squash
1 tsp vanilla or pecan extract
3 Tbsp sugar (I like brown or maple sugar for these)
2 cups whole wheat pastry flour
1 1/2 tsp backing powder
1/2 tsp salt
1/2 cup toasted pecan pieces
1 small apple, peeled, cored and diced into small chunks

Preheat a waffle iron.

In a large bowl, beat together eggs, milk, melted butter, sweet potatoes and extract until well blended. Sift in flour, sugar, salt and baking powder. Stir until mostly mixed. Add pecans and apples and stir until well combined. Add more milk if the batter looks too thick (should be a normal consistency for waffles, a little thicker than pancake batter).

Prepare waffles according to the directions that came with your waffle iron. Serve with maple syrup and either hot cider or pumpkin spice lattes.

Sunday, October 25, 2009

A Not-So-Pumpkin Pie


In the search for Thanksgiving desserts, you're looking for something seasonal, traditional enough to put people in their comfort zone, but different enough to avoid being boring. In this quest, I also wanted to get rid of the glut of butternut squash that was building up from the CSA. Enter a pie, reminiscent of the classic pumpkin, but spicier, silkier, and I think tastier.


I prefer not to roast the halved squash, but cut it into chunks, which caramelize better, lending more depth of flavor to the dish. For a truly amazing, flaky and flavorful crust that doesn't get soggy, use this all butter version, made with no more equipment then a bowl, your fingers and a rolling pin. Although I've always made food processor or pastry cutter crusts, I've recently been converted back to the handmade version, which is infinitely more consistently great.

Gingered Butternut Squash Pie


1 9-inch blind baked pie shell, see preparation below

1 large or 2 small butternut squash, peeled, seeded and cut into large to medium sized chunks (enough for 1 1/2 cups puree)
1 cup tightly packed dark brown sugar
3 large eggs
3/4 cup low-fat evaporated milk
1 tsp ground cinnamon
1 tsp ground ginger
1/2 tsp freshly ground nutmeg
1/2 tsp allspice
1/4 tsp cayenne pepper
1/4 tsp salt
2 Tbsp all purpose flour
1 Tbsp melted butter
1 tsp vanilla

Preheat the oven to 400 F, with the oven rack in the middle. Oil a jelly roll pan and scatter squash pieces across it. Roast until soft and just slightly caramelized. Reduce oven temp to 350 and move rack to the bottom third of oven. Transfer squash to a food processor and puree until smooth. Add all other ingredients and puree for at least 3 minutes, until silky smooth. Pour into prepared pie shell. Bake for 50-60 minutes (check after 30 min to see if you'll need to shield the pie crust with some aluminum foil). The pie is done when you can insert a toothpick in the middle and it comes out clean. Transfer to a cooling rack and cool completely before serving (this step is really important because it doesn't fully set until cool). Serve with whipped cream.


Tender, Flaky All Butter Pie Crust

6 oz all-purpose flour (about 1 1/3 cups but you really ought to weigh it)
1 tsp sugar
1/3 tsp salt
8 Tbsp cold unsalted butter, cut into 1/2 inch cubes
3 to 4 Tbsp ice water

Combine flour, sugar, salt and butter in a large bowl. Toss, then rub the butter bits with your fingertips, slowly smearing the butter into the flour. You want to form small flaky chunks in the mixture. Once all of the butter has been incorporated this way, Sprinkle ice water over the dough and use your hands to push and mix it together, adding more water if necessary, until the dough just sticks together when you press it into a ball. Gather all of the dough into a disk, plastic wrap it and stash it in the fridge for at least an hour or overnight.

Let the dough soften slightly before rolling by sitting out at room temp for 5-20 minutes (5 if it's been chilling for an hour, 20 if it's been a day or so). You want the dough to be cold and firm but still fairly easy to roll. On a floured countertop, roll the dough out into a 10 or 11 inch round (about 1/8 to 1/4 inch thick. Transfer to a pie plate and crimp the edges (for the wheat inspired crimp seen here, use kitchen shears to snip the folded over edges of the crust in abut 1/2 inch at a 45 degree angle every 1/2 inch or so around the entire edge. Then fold alternating sections in and out to resemble the grain). Prick bottom and sides with a fork and chill for one hour.

Preheat the oven to 425 F while you allow the crust to warm up a bit from the fridge (not too long - should be moderately cold still). Line the crust with aluminum foil and weight it with dried beans. Bake for 15 min in the middle of the oven, then reduce heat to 375, remove the foil and beans and let bake for 5-7 minutes more. Cool on a rack while you make the filling.

Tuesday, September 22, 2009

Apples & Spice & Everything Nice


I don't need to tell you again how much I love fall, how I smile more in cooler air, how cider sets my heart a flutter, the smell of wood burning stoves gets me out of bed on the most difficult mornings, how the colors in the treetops continue to inspire and drive me. Surely I've said enough about this while extolling the virtues of butternut squash salads and tarts, warm spiced nuts, melt in your mouth pot roast, and gooey pear laden pumpkin spice sticky rolls.


And as if you haven't gotten enough apples with apple crisp and cider donuts, I'm back to overdose you and every friend I can gather on my favorite fruit. This time it comes in the form of a lovely carrot cakesque layer cake, complete with cream cheese frosting. While this is no friend to the calorie counter, it will be a welcome guest at any fall birthday or dinner party, and it's currently auditioning for a role in my annual Thanksgiving line up.

Apple Spice Cake


2 medium Gala, Fugi, Braeburn or other sweet firm apple, peeled and cut into 1/3 inch cubes
2 Tbsp cognac (you can substitute bourbon or caldavos)

2 sticks (1 cup) unsalted butter at room temperature
1 cup sugar
1 cup dark brown sugar
3 jumbo eggs
1 tsp vanilla extract
1 tsp pecan extract (if you can't find it use almond or more vanilla)
3 cups all purpose flour
1 1/2 cups unsweetened applesauce
1 1/2 tsp baking powder
1/4 tsp baking soda
1/2 tsp salt
1 1/2 tsp cinnamon
1/2 tsp allspice
1/2 tsp freshly grated nutmeg
1/2 tsp ground ginger
1/2 tsp freshly ground green cardamom (one of those ingredients that you can leave out, but it will be missing some depth)
2 cups toasted pecan halves, divided

8 oz cream cheese at room temp
1 stick unsalted butter at room temp
1 tsp vanilla extract
1 tsp pecan extract
pinch of salt
3 cups powdered sugar


After dicing the apple, allow it to macerate in the cognac for about an hour (the addition of macerated dried apple is also great in this).

Preheat oven to 350 degrees F. Butter and flour two 9 inch cake pans. In the bowl of an electric mixer, beat the butter until soft then cream in the sugars. Beat in each egg, one at a time, followed by the extracts. Sift in 1 cup flour and mix, then add 3/4 cup applesauce, mixing again, followed by another cup flour and remaining applesauce. Finish by sifting in the remaining flour with baking powder and soda and spices. Mix until just blended. Crumble in 1 1/2 cups toasted pecans and add macerated apples, then stir to combine. Divide evenly between 2 cake pans and bake for about 50 minutes, or until a toothpick inserted in the middle comes out clean. Cool completely before frosting.

To make the frosting, blend cream cheese and butter until creamy and soft. Add extracts and salt, mix thoroughly. Sift powdered sugar into cream cheese mixture and beat until well combined. Apply liberally between and around cake layers. Top with remaining 1/2 cup pecans.

Sunday, April 12, 2009

Tribute to the Bunny


How in the world did easter get tied up with an Easter bunny who laid eggs? What sort of person thought up this mammal-turned avian and decided it would be a great mascot to leave candy for children and thus commemorate Jesus rising again from the grave?


These questions haunt me every year. This year I decided to do some research. Apparently, the bunny predates christianity as a symbol of fertility and birth in the Spring. Not entirely surprisingly, the same people who gave us the Christmas tree, those zany Germans also were the first to associate a bunny with Easter in the 1500s, and creating the first edible Easter bunnies in pastry in the 1800s.


The eggs came along because they were also a symbol of fertility. The Pennsylvania Dutch seem to be responsible for the notion that the Easter Bunny would lay colored eggs for the children, if they were good little doobies. They brought the tradition to America in the 1700s, and their children would make a nest out of a hat or bonnet for the Easter bunny to fill. Legends suggest that the notion that a hare would lay eggs was in fact a misconception due to the fact that birds called lapwings nested on the ground on what looked like the top of a hare burrow.


So in the end, this is another example of Christian holidays bearing symbols from Pagan times, probably to make people more comfortable converts, since their traditions got carried on. In any case, I think the Bunny deserves a little attention. So here's a great carrot cake for your little bunnies. The crystallized ginger adds a hint of heat to the moist cake, flecked with shreds of carrot, toasted pecans, dried cranberries and apricots. The maple cream cheese frosting lends just the right amount of creamy sweetness.

Golden Carrot Cake


2 cups all purpose flour
2 tsp baking powder
1 1/2 tsp baking soda
3/4 tsp salt
1 tsp ground cinnamon
1 tsp ground allspice
1 tsp five spice powder
1 tsp ground cardamom

4 large eggs
1 cup sugar
1 1/4 cup firmly packed light brown sugar
1 cup vegetable oil
1 stick butter, melted (1/2 cup)
1/4 cup pineapple orange juice
1 Tbsp vanilla extract
1 1/2 tsp pecan extract (optional)
zest of one orange

3 Tbsp finely chopped crystallized ginger
1/2 cup dried cranberries, chopped
1/2 cup dried apricots, finely chopped

3 cups finely packed shredded carrots
1 cup toasted and cooled pecans, chopped

Preheat oven to 350 F. Grease and flour two 9 inch cake pans. Sift together all dry ingredients and set aside.

Beat eggs with sugar until well combined. Add the remainder of the wet ingredients and mix well. Add crystallized ginger and dried fruit and stir. Then sift in dry ingredients and mix until just blended - there will be lumps.

Add in carrots and pecans and stir. Turn out evenly into the two prepared pans. Bake on the middle rack until a skewer inserted in the middle comes out clean, about 30-35 minutes. Cool in their pans for 15 minutes, then turn out on a cooling rack. Cool completely before frosting.

Maple Cream Cheese Frosting


16 oz (1 pound) cream cheese, softened
1/2 cup (1 stick) butter, softened
1/4 cup Grade B dark amber maple syrup
2 cups confectioners sugar, sifted

Combine all ingredients in a stand mixer with a whisk attachment and blend until well combined and no longer lumpy. Chill 15 minutes to allow frosting to set a bit. Reserve a little bit for the carrot piping.

Assembly:


Level the two cake layers using a serrated knife and devour the scraps. If desired, split into four layers and spread marmalade between the 2 halves of each cake. Put one layer on a cake stand, then a layer of frosting, follow with another layer of cake and more frosting. Pipe carrots on top of each piece - I used a shell tip for the carrots and a leaf tip for the tops.

In Search of the Egg


When I was a child Easter was a magical holiday. My father was the master of the Easter Egg Hunt. Now, I'm not talking close your eyes and i'll hide some eggs, then you scuttle around trying to find them before your bratty little brother. I'm talking personalized clues for both of us, made weeks in advance, hidden in candy filled eggs. We had to decipher the clue in order to find the next one, and hours later eventually find the treasure trove in a basket somewhere we never would have looked. The hunt began in an Easter egg suspended by ribbon just above our pillows, so when we woke up it we couldn't miss it.

To this day my dad insists that it was just a ploy to buy him a couple more hours of sleep. And although God knows a man who commuted 2 hours each way every weekday and traveled several times a month needed all the sleep he can get, I know it was a lousy excuse. He loved how happy it made us, how we felt like pirates searching for lost treasure and seeing our beaming faces all day long, straight through church service and on through dinner, even with the dreaded brussel sprouts. I think Easter was the one holiday my father actually enjoyed. His parents divorced over the winter holidays and so his memories are not so pleasant. But on Easter he would arise to our cheers and looting of our baskets and make a plate of deviled eggs and leisurely read the paper before we got dressed up and prepared for the day's festivities.

Now that we've all grown up and gone, I hope he still lingers in the window seat with his morning coffee and his thoughts drift back to days gone by, as mine have this morning. I hope it brings a smile to his face. Here's to you dad, and here's what I would cook for Easter.

BRUNCH


Bacon Cheddar Scallion Quiche
Quiche is the perfect brunch dish. Here's why: 1 - you can make it with almost anything, any leftover meats and veggies you can scrounge up. 2 - It reheats beautifully (not to mention it's also good cold), making it the perfect make ahead dish. This was always a favorite of my dad's, although on easter, it would have been deviled eggs, probably with the hard boiled ones we dyed the day before. The ricotta may sound out of place, but it lends a delightful creaminess to the quiche, especially when left in small chunks. If this one doesn't suit your mood, try Cajun quiche instead.


1 store bought refrigerated pie crust
8 oz shredded sharp 2% cheddar cheese
5 slices bacon, crisp cooked
1/4 cup ham chunks (optional)
5 small scallions, white and green parts sliced thin
1/2 cup fat free ricotta
8 eggs
1/4 cup 1% milk
salt and pepper to taste

Preheat the oven to 375 F, with a rack on the lowest shelf. Roll out pie dough and press into a greased 10 inch tart pan. Spread half the cheddar over the bottom of the crust. Sprinkle on bits of the bacon, ham and scallion. Dollop the ricotta in about a tablespoon at a time. Top with remaining cheddar. Beat the eggs with the milk until well combined, then pour over the fillings. Sprinkle the top with salt and pepper.

Bake on the bottom rack until crust and top is slightly golden and filling is set, about 45 minutes.

DINNER


Root Beer Baked Glazed Ham over Carrots
I can't believe that a glazed ham has not yet graced these pages, since it's one of my standybys, especially for large gatherings. However, upon making it I can see why, it's not very photogenic. It is darn tasty though. Buy a ham that actually looks like it came off of a pig, with the bone in, and not one of those pressed monstrosities. I prefer the shank end, and try to make sure it doesn't have water added if you can. Do not bother with spiral sliced - they dry out easily and it's really not that hard to slice a ham.

1 small bag baby carrots
10-15 pound half ham, bone in
cloves
1 1/2 cups root beer
1 1/2 Tbsp whole grain mustard
1 Tbsp vinegar from a jar of hot pickled peppers (or white vinegar)
1 Tbsp maple syrup
2 Tbsp bitter orange marmelade (British if possible)
1 tsp Worcestershire sauce
1/2 tsp liquid smoke (optional)
1 tsp soy sauce
1 cinnamon stick
1 bay leaf
1 tsp chile powder
1 tsp smoked paprika
1 tsp black pepper

Preheat oven to 325 F.

In a 13 x 9 glass baking dish, line the bottom with a layer of carrots. Trim the ham of any hard rind and place flat side down on top of carrots. Use a clean utility knife open to the second click (you can use a regular knife, but be really careful about the depth of the cut) to cut a diamond pattern into the ham. It should cut through the fat without cutting much of the meat. Stud the corners of the diamonds with cloves. Pour 1 cup of root beer into the dish and bake on the bottom rack for 1 hour and 15 minutes, basting every 15 minutes.


Meanwhile, make the glaze by combining the remaining ingredients in a small saucepan. Bring to a boil and reduce liquids to a thick syrupy consistency over medium heat. Remove cinnamon stick and bay leaf before using.

After the first round of baking, remove the ham from the oven, insert an oven safe thermometer - I like the probe kind that has a digital reader outside of the oven - and brush on the glaze (you won't use it all right away). Return to the oven and bake, brushing with glaze every 15 minutes, until internal temperature reaches 140 degrees F. Remove from oven and let sit 10 minutes before slicing. Serve any leftover glaze on the side for guests to brush on individual slices if they choose.

Serve with the carrots (which take on a fabulous flavor from the pan juices) and corn bake.

Monday, December 22, 2008

Up on the rooftop...


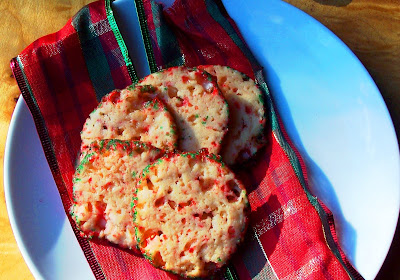
To say things have been crazy lately would be an understatement. I'm taking a new class that requires a 10 page paper every week, assigned on Monday and due on Thursday. Oh, and then a group paper on the same subject on Sunday. It's been overwhelming, grading has been piling up and on top of it all, I've been trying to prepare three holiday dinners. It hasn't all been bad, in fact I have some big news to share with you at a later date, but I'm looking forward to a much needed vacation up North. I'm leaving you with a cookie recipe Santa will love...crispy chewy sugar cookies studded with tiny bits of candy cane.


Candy Cane Sugar Cookies


6 oz. original peppermint candy canes

2 sticks unsalted butter, softened
2/3 cup sugar

1 egg
1 egg yolk
1 tsp vanilla extract
1 tsp peppermint extract
1/4 cup half and half

3 cups unbleached all-purpose flour
1/2 tsp salt
1/2 tsp baking powder

finishing sugars
cookie cutters


Pulverize candy canes in a sturdy ziploc bag by pounding them with a meat mallet. When you've done a smashing good job, you should be left with a mixture of powder and very small pieces.

In the bowl of a stand mixer fitted with a paddle attachment, beat butter briefly to fluff it up. Add crushed candy cane and sugar and cream together until light and fluffy. Beat in egg & yolk, extracts and half and half.

Sift in flour, baking soda and salt. Mix until it comes together into a soft dough. Turn out each half onto a square of plastic wrap, form into a disk, wrap tightly and refrigerate at least one hour or up to 2 days.

Preheat the oven to 350 F. Roll out the disk of dough until it is 1/4 inch thick (use a silpat or a floured counter for this). Use cookie cutters to cut out whatever shapes you desire. If you like, roll the edges in finishing sugars. Arrange on baking sheets lined with parchment or silpat, about 2 inches apart. Bake for 7 minutes, then rotate the pans and bake for another 6-8 minutes, or until lightly golden. Transfer to wire racks. Decorate with melted chocolate if desired.

Sunday, December 7, 2008

Devilish


It's holiday season and with all the parties coming up it helps to have an arsenal of hors doeuvres in hand. One particular classic has the bonus of being incredibly inexpensive and easy to prepare. As if that wasn't enough there are seemingly endless tasty variations to be made. What is this heavenly food? Nothing but a deviled egg!

Here's my version (and yes, I have been known to eat these for breakfast):

Deviled Eggs

8 large eggs
3 slices of hickory smoked bacon, cooked & crumbled
2 thinly sliced scallions
3 Tbsp mayonnaise (we use homemade - but we're crazy like that)
1 Tbsp sweet pickle relish
1 tsp dijon mustard
a shot of hot sauce
a shot of worcestershire sauce
1 tsp Old Bay seasoning
1/2 tsp garlic powder
dash or two of smoked paprika
salt and pepper to taste

Place all of the eggs in a saucepan in one layer and cover with cold water. Bring to a boil over high heat, then reduce to medium and simmer about 8 minutes. Plunge into icy cold water to cool. Once cool, the skins should peel off quite easily.


Halve the eggs and remove the egg yolks - transfer yolks to a small bowl. Mix egg yolks with the rest of the ingredients. Mash to combine. Pipe or spoon back into the egg halves. Arrange on a platter and top with a sprinkle of smoked paprika.

Saturday, December 6, 2008

Macaron Madness


I generally don't like trends. I try to avoid trendy clothes, trendy furniture, trendy decor. The problem with trends is that most of the time we move on, we change our tastes and our perspective. And then those items that were so in, all of a sudden so aren't. So I am of a mindset that everything in my life should be timeless. And so far, through that, I've been able to avoid a variety of embarrassing moments, from not having a bad high school yearbook photo to not regretting the color on my walls.

However, there are some cooking trends that I have fallen victim to. It all started with no knead bread. Like most trends, I was so reluctant to jump on the bandwagon that I made my version long after it was the talk of the blogosphere. But when I did....ohhhh...heavenly! So this was what everyone was talking about! So once again, although I'm behind the times, I decided to give trendy food a shot. I bit the bullet and made macarons with all my extra egg whites from last week's pumpkin pie and tiramisu. And you know what, they really are pretty cool. I was amazed at how easy it was to replicate flavors in the egg white medium. And with a little practice and adjusting, they really aren't that difficult.


Sometimes trends are destined to be classics. The macaron has a timeless appeal because of the dizzying array of flavors that are possible. I'm proud to say I'm no longer a macaron virgin! And I'm confident that this will not be my last batch!

For my initiation into the world of macarons, I relied on THE macaron reference, an article published in Desserts magazine by Helen of Tartlette. Although it was immensely helpful, I did have some minor problems to work through. The biggest one was that my cookies were not cooking all the way through at the time and temperature she provided. But with some minor adjustments, they really came together.

Since I was already being so trendy, I wanted to go with some very classic holiday flavors. Eggnog and nutella macarons were the perfect dessert to top off our friends' annual wine and cheese bash.


Eggnog & Nutella Macarons Modified from Tartlette- invest in a scale - it's important to do this by weight!

100 g egg whites (about 3)
55 g hazelnuts
55 g almonds
200 g powdered sugar
2 Tbsp vanilla powder
50 g sugar

The day before you want to make the macarons, set the egg whites out to age in a covered dish in a cool corner of the kitchen.

The next day, pulse nuts, powdered sugar and vanilla powder together in a food processor until thoroughly ground to a powder (about 2 minutes of pulsing). Sift into a medium sized bowl and set aside.

Whip the egg whites on medium high speed in a stand mixer. When meringue reaches soft peak stage, add sugar gradually while mixing. Whip until firm peaks or reached, or until you can hold the bowl upside down without anything coming out.

Use a rubber spatula to fold in the dry ingredients, scraping up from the bottom and turning it over the top. Stop after the first three folds. Split into 2 different bowls.


For Eggnog Macarons: add 1 tsp freshly ground nutmeg
For Nutella Macarons: add 1 1/2 Tbsp high quality cocoa powder

After adding the flavorings, continue to fold until mixture gets shiny, dry ingredients are all incorporated, and batter drops in thick ribbons and flattens itself out without any poking or prodding.

Empty into a pastry bag or ziploc bag with a hole cut in the end. You can use a pastry tip that's 1/2 to 3/4 inches wide. I just use the pastry bag as is, since the opening on mine is just about that size.

Line 2 baking sheets with Silpat or parchment paper. Pipe the batter in 1 1/2 inch diameter circles on the prepared pan. Let sit for 30-60 minutes so that they can develop a skin. In the meantime, preheat oven to 335 degrees F. (I know - it's a weird temp, but it was the only one that worked for me)

Bake for 15-18 minutes, or until you can touch the "feet" of a macaron and it is firm, not mushy. Let cool 10 minutes on pans, then remove to a cooling rack. (If they're cooked all the way, they shouldn't stick.) Let cool completely before filling.


For Nutella macarons: fill with nutella! Couldn't be simpler!

For Eggnog Macaroons : Eggnog Ganache

1/3 cup eggnog
1 1/4 cup Green & Black's white chocolate, broken into little pieces
1/4 tsp freshly ground nutmeg

Heat the eggnog until it is just below a simmer. Pour over the chocolate and stir to melt. Add nutmeg and stir until ganache is smooth. Let sit until cool and just barely spreadable. Fill eggnog macarons with a thin layer and sandwich them together.

Saturday, November 15, 2008

A Case of the Munchies...


At every dinner party, there's that period of time when the cook needs to put the finishing touches on the meal, when everyone has a cocktail, but as the host, you're wondering if you're keeping them waiting too long. An easy, make-ahead munchie can save the day, cutting hunger without filling anyone up.

Since Thanksgiving is the ultimate dinner party, and I have a huge group of starving people to fend off, I like to put out some really great cheese, an antipasto platter, crudite and these spiced nuts. It's all easy and store-bought except for the nuts. I make them the weekend before and all I have to do is plop em in a bowl and put them on the table. Take a glance back in a couple minutes and they'll be gone - but you'll be a hero.

Spicy Mixed Nuts


2 1/2 cups mixed nuts - any combination of whole almonds, cashews, macademia nuts, peanuts, pecan halves or walnuts
1 1/2 Tbsp melted unsalted butter
3 1/2 Tbsp dark brown sugar
2 tsp ancho chile powder
1/2 tsp cayenne pepper
1 tsp pumpkin pie spice
2 Tbsp maple syrup
1 1/2 tsp coarse kosher salt
1 cup mini-pretzels, broken up slightly

Preheat the oven to 350 F.

Spread out the nuts on top of a silpat* on a baking sheet and toast in the oven, stirring occasionally and checking frequently, until golden and fragrant, about 7 minutes.

Meanwhile, mix butter, sugar, spices and maple syrup in a medium bowl.

When nuts are done, empty them into the bowl, followed by salt and pretzels. Toss to coat, then turn back out onto the silpat. Bake for 10 minutes, stirring twice. Remove from oven and let cool.

These are good slightly warm, but if you cool them completely they'll last for a week in an airtight container (ready and waiting for the doorbell to ring!)


*A silpat is a silicone coated sheet pan lined that I strongly suggest you invest in if you do a lot of baking. If you don't have one, parchment paper will work, but it may stick a bit more and it can be awkward to work with.
Related Posts with Thumbnails